I put a some effort in finding out how to install an EPiServer CMS 6 site on a virtual machine running Windows Server 2008 R2 Server Core; there was a question about it on the EPiServer World Forums and I thought I’d help out a bit. The whole process turned out to be a little bit trickier than I had anticipated, but I managed to get it running in the end.
I did my POC on an evaluation machine (Hyper-V) that I downloaded from the Microsoft website. If you are not familiar with Server Core you can read about the benefits at Microsoft Technet: Why Is Server Core Useful?
What to download in order to install EPiServer on Windows Server 2008 R2 Server Core?
Below is a list of files that I ended up downloading from the supplied links.
- Windows Server 2008 R2 Enterprise Edition x64 (Core Install) VHD
- This is the virtual image that I started with.
- Windows 7 and Windows Server 2008 R2 Service Pack 1 (KB976932)
- Because you will need .NET Framework 4 to install PowerShell 3. The 64-bit version is the one you want (windows6.1-KB976932-X64.exe).
- Microsoft .NET Framework 4 (Standalone Installer) for Server Core
- If your website won’t need this, you will at least need it to get PowerShell 3 up and running.
- Windows Management Framework 3.0
- Includes Windows PowerShell 3.0, WMI, WinRM, Management OData IIS Extension, and Server Manager CIM Provider. I used Windows6.1-KB2506143-x64.msu.
- Microsoft® SQL Server® 2008 R2 SP2 – Express Edition
- We need some sort of SQL database server, the 64-bit is the one that you want if you’re using the same image as I; SQLEXPR_x64_ENU.exe.
- EPiServer CMS 6 R2
- This is the one that I used, but I don’t see how other versions should be too much of a problem.
How to install EPiServer on Windows Server 2008 R2 Server Core
After extracting the virtual machine and importing it into the Hyper-V Manager, connect to it and hit the start button. The first time you open this image, you will be asked to supply a password for the Administrator account. Do it, and copy what you’ve downloaded to the server.
Upgrade to Windows Server 2008 R2 Server Core installation Service Pack 1
.NET Framework 4 won’t install unless you first upgrade your server to SP1, so run the file windows6.1-KB976932-X64.exe from the command prompt and you will be presented with the installation wizard. Tick the automatically restart computer checkbox and let it install the service pack.
Install PowerShell 3 on Server Core
Before we can install Windows PowerShell 3 onto our machine, we will need to enable .NET Framework 2.0 and PowerShell 2. This is done by the following commands; DISM is the Deployment Image Servicing and Management utility.
dism /online /enable-feature /featurename:NetFx2-ServerCore
dism /online /enable-feature /featurename:NetFx2-ServerCore-WOW64
dism /online /enable-feature /featurename:MicrosoftWindowsPowerShell
PowerShell 3 will require us to have .NET Framework 4.0 installed on the server, so run the file dotNetFx40_Full_x86_x64_SC.exe from the command prompt and use the installation wizard. Next install Windows Management Framework 3.0 which will contain PS3; I used the file Windows6.1-KB2506143-x64.msu. The installation will require another server restart.
Also enable .NET Framework 3.0 as EPiServer’s PowerShell script Install database (SqlServer).ps1 won’t function without it.
dism /online /enable-feature /featurename:NetFx3-ServerCore
dism /online /enable-feature /featurename:NetFx3-ServerCore-WOW64
Install Internet Information Services (IIS) on Server Core
Now it’s time to enable the Internet Information Services, as well as a couple of related features, on our Server Core installation. This is done by issuing the following commands.
dism /online /enable-feature /featurename:IIS-WebServerRole
dism /online /enable-feature /featurename:WAS-WindowsActivationService
dism /online /enable-feature /featurename:WAS-ProcessModel

dism /online /enable-feature /featurename:WAS-NetFxEnvironment
dism /online /enable-feature /featurename:IIS-ISAPIExtensions
dism /online /enable-feature /featurename:IIS-ISAPIFilter
dism /online /enable-feature /featurename:IIS-NetFxExtensibility
dism /online /enable-feature /featurename:IIS-ASPNET
You will also need to enable the IIS-ManagementService; EPiServer’s Deployment Center will require this to start.
dism /online /enable-feature /featurename:IIS-ManagementService
If you’d like to enable remote management you may do so by altering the registry a bit as below (optional).
reg add HKEY_LOCAL_MACHINE\SOFTWARE\Microsoft\WebManagement\Server ^ /v EnableRemoteManagement /t REG_DWORD /d 1
Start the service by running this:
net start wmsvc
Install Microsoft SQL Server Express Edition on Server Core
Install SQL Express by running the installation program from the command prompt; make sure you use the correct version or you will encounter a few nasty errors. That’s SQLEXPR_x64_ENU.exe for the 64-bit version in this article.
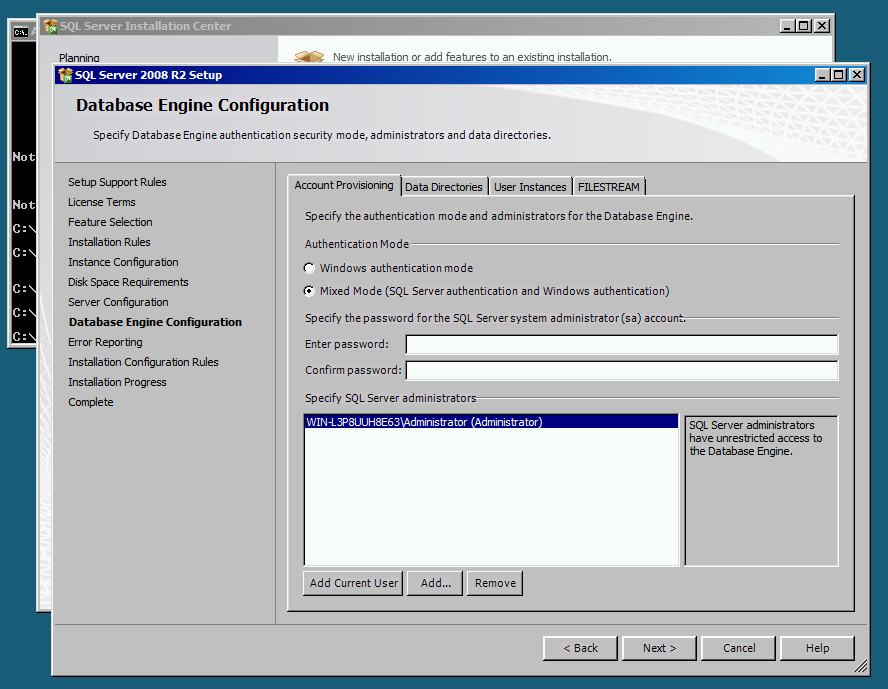
Make sure that you select Mixed Mode as Authentication Mode when you get to the Database Engine Configuration step in the installation process.
Install EPiServer CMS 6 R2 on Server Core
Now it’s finally time to install EPiServer; run the Setup.exe file from the command prompt. You can also install a site with a SQL database at this point. Notice that the installation process will report an error at the very end after everything is commited; this is because it is trying to open a browser and surf to your new website.
Viewing the EPiServer site from your host
If you have set up your Hyper-V configurations correctly and is still unable to access your virtual environment, you might need configure the Server Core Windows Firewall. I turned it off by using the following command (thank you Jens Engfors at Basefarm).
netsh advfirewall set allprofiles state off
A list of all the installed features – oclist
If you run the command oclist you will get a list of all the features that are installed as well as not installed. These are the installed ones from my working environment. Depending on your needs, you may also want to enable others such as for instance IIS-BasicAuthentication and certificate related ones.
- IIS-WebServerRole
- IIS-WebServer
- IIS-ApplicationDevelopment
- IIS-ASPNET
- IIS_ISAPIExtensions
- IIS-ASPNET
- IIS-ISAPIFilter
- IIS-ASPNET
- IIS-NetFxExtensibility
- IIS-ASPNET
- IIS-CommonHttpFeatures
- IIS-DefaultDocument
- IIS-ASPNET
- IIS-DirectoryBrowsing
- IIS-HttpErrors
- IIS-StaticContent
- IIS-DefaultDocument
- IIS-HealthAndDiagnostics
- IIS-HttpLogging
- IIS-RequestMonitor
- IIS-Performance
- IIS-HttpCompressionStatic
- IIS-Security
- IIS-RequestFiltering
- IIS-NetFxExtensibility
- IIS-ASPNET
- IIS-NetFxExtensibility
- IIS-RequestFiltering
- IIS-ApplicationDevelopment
- IIS-WebServerManagementTools
- IIS-ManagementService
- IIS-WebServer
- MicrosoftWindowsPowerShellV3
- NetFx2-ServerCore
- IIS-ASPNET
- IIS-ManagementService
- IIS-NetFxExtensibility
- IIS-ASPNET
- MicrosoftWindowsPowerShell
- NetFx2-ServerCore-WOW64
- NetFx3-ServerCore-WOW64
- NetFx3-ServerCore
- NetFx3-ServerCore-WOW64
- WAS-NetFxEnvironment
- ServerCore-EA-IME
- ServerCore-WOW64
- NetFx2-ServerCore-WOW64
- NetFx3-ServerCore-WOW64
- NetFx3-ServerCore-WOW64
- NetFx2-ServerCore-WOW64
- WAS-WindowsActivationService
- WAS-NetFxEnvironment
- WAS-ProcessModel
- WindowsRemoteManagement
- WindowsRemoteManagement-ServerOnly
A few encountered errors and how to fix them
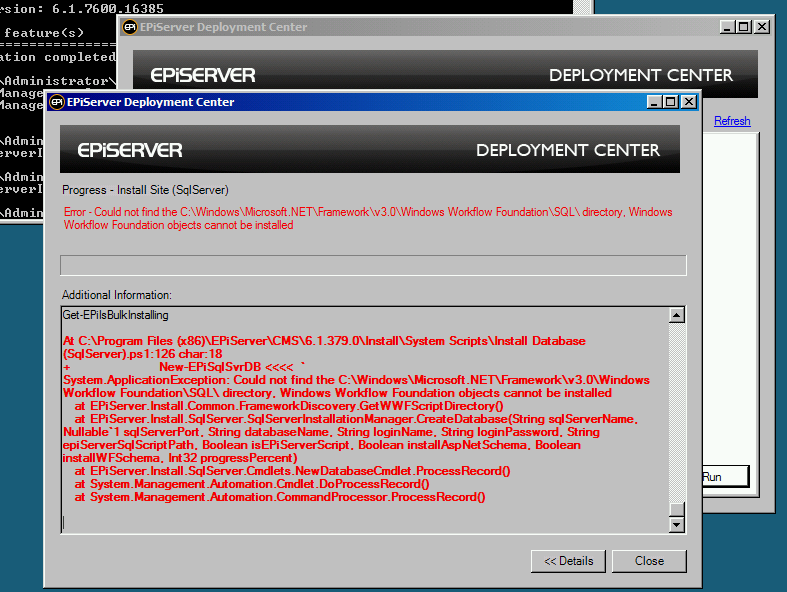
EPiServer’s Install Database (SqlServer).ps1 script could not find directory – Windows Workflow Foundation objects cannot be installed
As the error message says, the directory C:\Windows\Microsoft.NET\Framework\v3.0\Windows Workflow Foundation\SQL\ could not be found. This is because you have not enabled .NET Framework 3.0.
dism /online /enable-feature /featurename:NetFx3-ServerCore
dism /online /enable-feature /featurename:NetFx3-ServerCore-WOW64
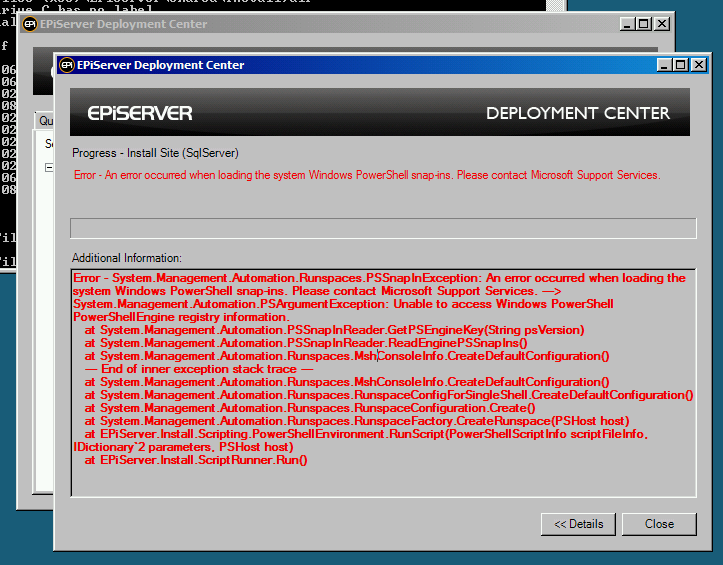
EPiServer Deployment Center – Error occurs when loading the system Windows PowerShell snap-ins
When PowerShell 3.0 is missing the Install Site (SqlServer) process will fail as it is unable to load snap-ins.
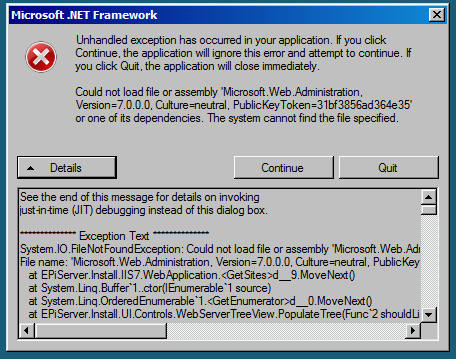
EPiServer Deployment Center not starting – Could not load file or assembly Microsoft.Web.Administration
Deployment Center won’t be able to start up unless you enable IIS-ManagementService in Server Core.
dism /online /enable-feature /featurename:IIS-ManagementService
net start wmsvc
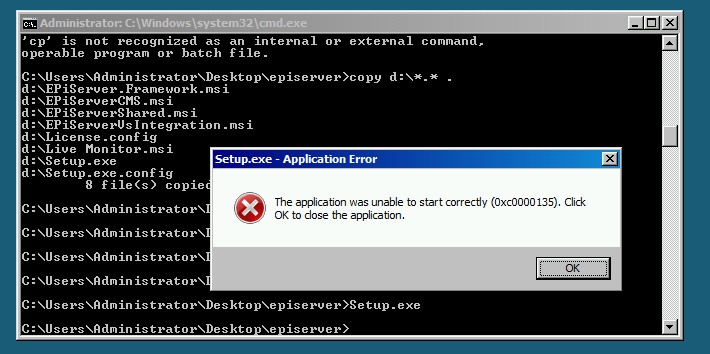
EPiServer installer Setup.exe – Application Error unable to start correctly (0xc0000135)
EPiServer’s installer Setup.exe is unable to start correctly because .NET Framework is not available.
dism /online /enable-feature /featurename:NetFx2-ServerCore
dism /online /enable-feature /featurename:NetFx2-ServerCore-WOW64

dism /online /enable-feature /featurename:NetFx3-ServerCore
dism /online /enable-feature /featurename:NetFx3-ServerCore-WOW64
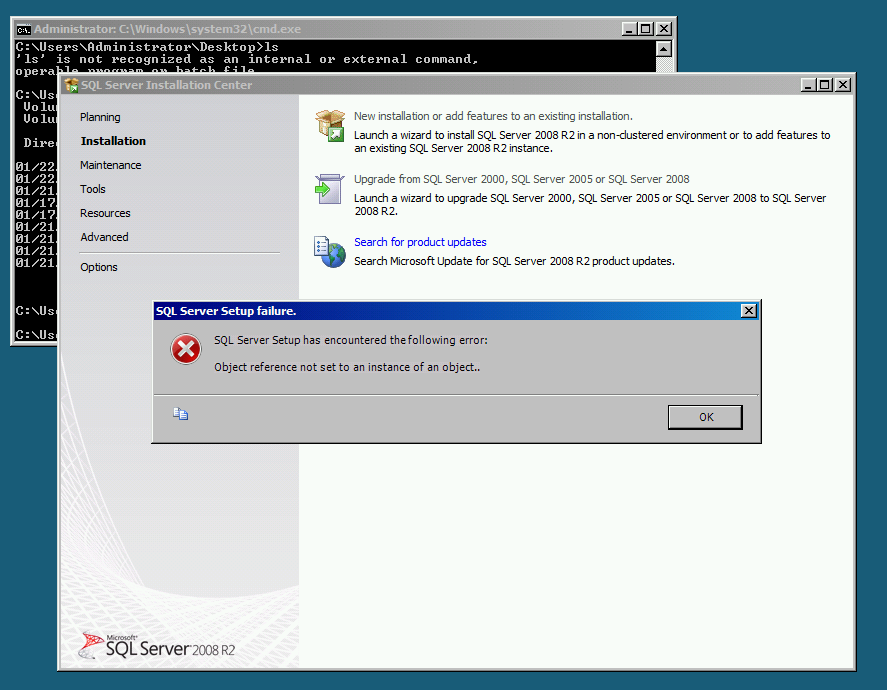
Microsoft SQL Server Express Setup failure – Object reference not set to an instance of an object, or SQL installer just silently won’t start
Make sure that you’re running the 64-bit installer if you are on a 64-bit system, and see to it that you have installed .NET Framework 4.
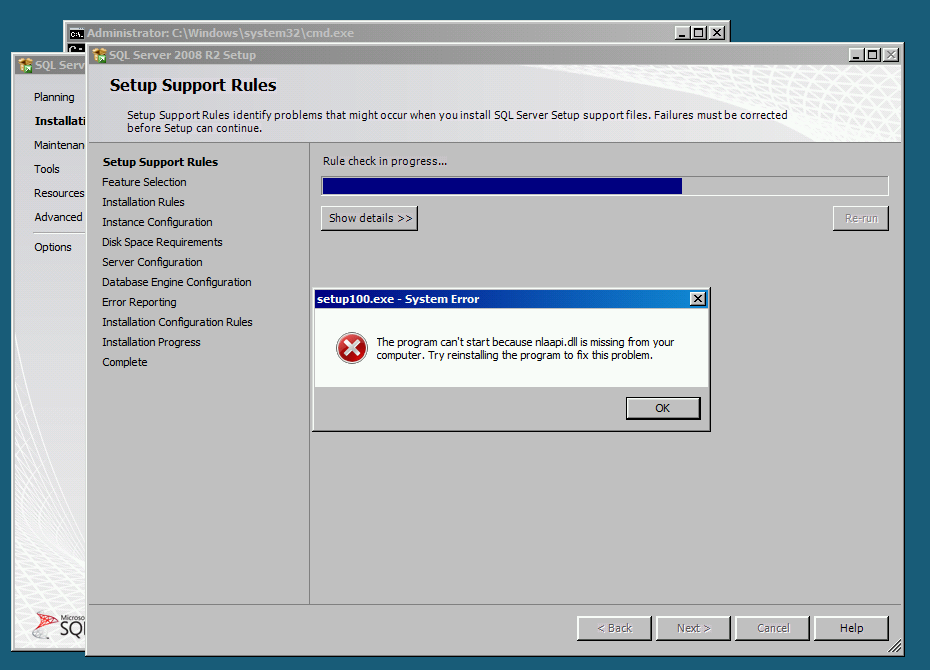
SQL Server setup100.exe – System Error when nlaapi.dll is missing from your computer.
This occured before I realized that I was running the 32-bit installer on the 64-bit Server Core. Once I switched to the proper version I was not bothered by this again.
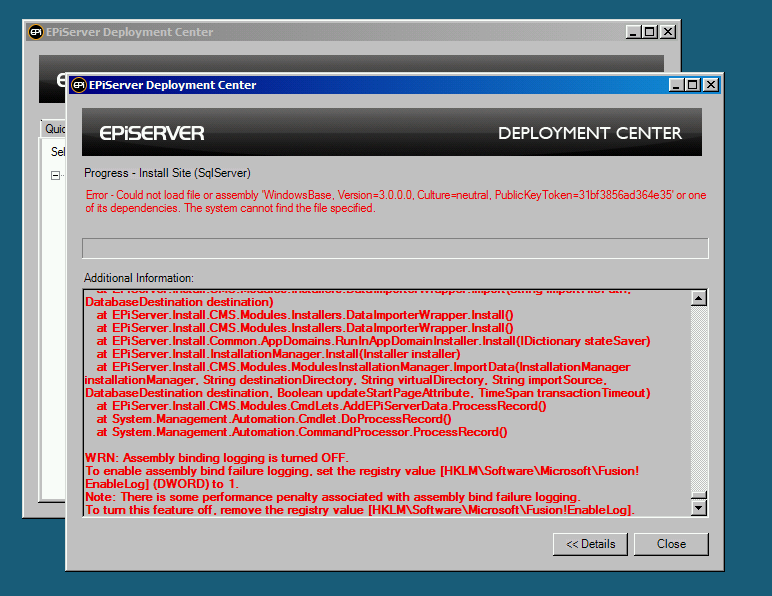
EPiServer Deployment Center could not load assembly WindowsBase when installing Alloy Tech templates
As the error message says, the file WindowsBase.dll cannot be located. As I was not really interested in installing the Alloy Tech templates I decided not to dive any deeper into this error; a quick Google search though, pointed towards it having something to do with Visual Studio.
Good one!
Thanks Johan :)